
2D Depth of Field Breakdown
- 22 mars 2023
- 3 min de lecture
Dernière mise à jour : 27 mars 2023

Depth of field (DoF) "is the distance between the nearest and the furthest objects that are in acceptably sharp focus in an image captured with a camera."

In 3D video games, Depth of Field (DoF) is generally achieved through a post-processing effect. The effect takes the screen texture and applies a DoF shader that blurs the image based on the strength of the reworked depth texture from the camera.

Unfortunately, depth texture does not work in Unity's 2D render pipeline. "2D graphics have semi-transparency e.g. multiple objects can contribute to the final color of the pixel. And in that case, the Z-buffer cannot store just one Z value, because the end color may not come from one object at one Z position. This is why Unity is not using a Z-buffer when drawing Transparent Geometry at all and thus DOES NOT offer a solution for the post-process Blur effect on transparent geometry shaders"
There are many different approaches to creating DoF in 2D. Check out this thread for more information.
I decided to take the depth texture approach because it's easier to manage with just a post-processing effect, and because the DARUMA environment does not use semi-transparency in the background. Additionally, I want to train myself in rendering and SRP scripts. So let's try to create DoF like in a 3D game!
First, we need to create a custom pass in the render pipeline before all other passes. This "Sprite Depth" pass will draw all desired sprites with a custom shader. This shader simply draws the sprite with alpha, but with a color relative to its distance from the camera. We save the texture to a global shader texture to use it later and then clear the render. Here is the result:

At this point, we can apply the post-processing effect based on the camera texture and the depth texture we created with a custom DoF shader. However, there are some problems with this method. The DoF shader produces artifacts. Since the DoF shader uses the screen texture to blur, sharp sprites on far backgrounds can appear blurry.

To avoid this, we can separate the DoF effect into two phases:
First, we will draw "background" sprites and apply the DoF effect to them.
Then, we will draw the "Default" sharp layer (because in DARUMA, the DoF target distance is always the player layer).
Finally, we will draw all sprites in front of the Default layer and apply the DoF effect to them using post-processing.
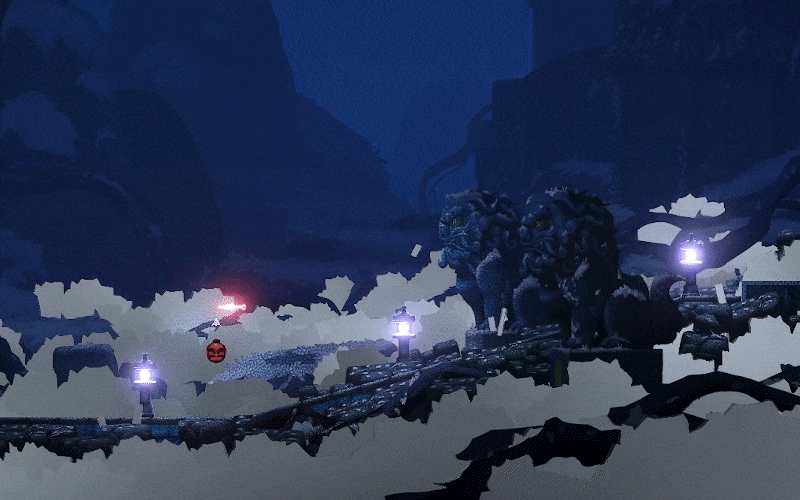
At this point in the game development, I am not sure if this process will work on low-end machines like the Switch or consoles. However, on my machine, the frame rate is really high, and draw calls are lower than 300-400. The textures used for depth can be drawn in really small sizes without significantly affecting the render. For the moment, I'll keep this feature on in the game.
Now let's make my DoF process step-by-step:
So, we have the depth texture for the backgrounds sprites, obtained from the depth pass (stopping just before default layer):

And the depth texture for the frontground environment from the depth pass:

After cleaning the screen, we can draw all sprites and stop before the Default Layer again:

Then, we can apply the DoF shader to the screen texture by passing background depth texture and using the a Blit function (or a quad screen sized):

Now, we can draw all other renderers:

Finally, we can apply the final pass using post-processing and our custom DoF shader by passing the front depth texture.

With this method, all the sprites in the default layers are not affected by the DoF effect. We don't have any artifacts with the default layer because the blur is applied before rendering the default layer. With my ambient light rect tool, I can set the DoF parameters such as distance, aperture, blur size, etc., for specific places in the game in real-time without worrying about transitions.
For the blur effect, I'm using 'Poisson Blur', which is a type of Gaussian blur that is computationally less expensive. I am still working on improving the feature, and I hope to find many ways to enhance the rendering quality and optimize the cost of this really cool effect.
Sources :


Commentaires